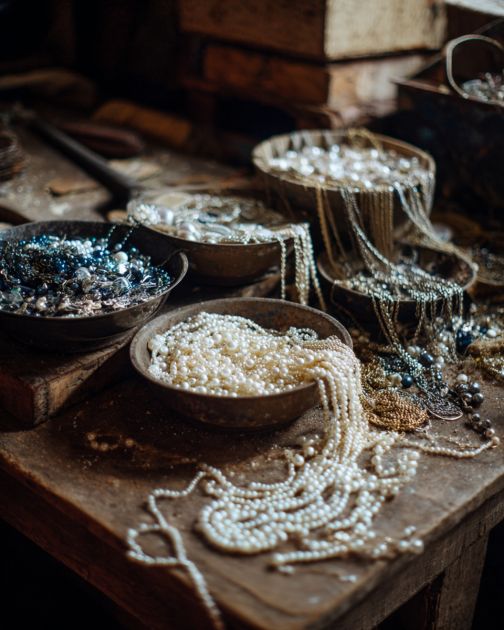
* Fake pearl necklaces (the more varied in size, the better)
* Branches (dried, painted, or natural)
* Thin wire (gold, silver, or copper works well for aesthetic appeal)
* Wire cutters or scissors
* Optional: hot glue gun or floral tape
* Decorative vase or wall mount (depending on your display idea)
Pro tip: Don’t buy new pearl necklaces for this project unless you want them for another purpose. Thrift stores, old costume jewelry, or pieces you no longer wear are perfect sources. This not only keeps costs low but also adds character to your creation.
## Step-by-Step Guide
Creating pearl and branch décor is simple and flexible. Here’s a step-by-step guide:
### Step 1: Prepare Your Branches
Start by selecting branches with interesting shapes. Look for natural curves, twists, and multiple offshoots. Trim any excessive twigs to keep the focus on the main structure. If desired, you can paint the branches white, black, or metallic to match your home aesthetic.
### Step 2: Break the Necklaces
Carefully break the pearl necklaces at intervals, leaving clusters of pearls on short strands of wire. This will make them easier to attach to the branches. Don’t worry about uniformity—random lengths add to the organic feel.
### Step 3: Wire Pearls onto Branches
Use thin wire to attach the pearl clusters to the branches. Wrap the wire gently around both the pearls and the branch, securing them in place. The goal is to create an impression of pearls naturally growing along the wood rather than a rigid, manufactured look.
Once your pearls are wired, take a step back and examine the piece. Adjust clusters, rotate branches, or add more pearls where needed. This is where your creativity shines—you can make the arrangement dense and dramatic or sparse and subtle.
### Step 5: Display Your Creation
Decide whether your branch will be a tabletop centerpiece, a hanging wall piece, or part of a larger arrangement. Place it in a decorative vase, hang it from a wall hook, or lean it against a mantel. The beauty of this DIY project is its adaptability.
—
## Styling Ideas
Here are some ways to style pearl branch décor without letting it overwhelm your space:
### 1. Minimalist Centerpiece
### 2. Bohemian Cluster
Combine multiple branches with varying pearl densities and place them in a low, wide vase. Surround them with candles, succulents, or small stones for an eclectic, boho vibe. This look works well on mantelpieces or as a dining table centerpiece.
### 3. Wall Art Installation
Wire several branches with pearls and mount them on the wall in a branching pattern. This creates a sculptural, three-dimensional artwork. It’s a subtle nod to natural forms but adds an element of sophistication through the pearls.
### 4. Seasonal Adaptation
Pearls can mimic snow or dew when paired with certain branch types, making this DIY project adaptable for seasonal décor. For winter, choose white-painted branches and pearl clusters for a frosty look. In spring, add small faux flowers for a fresh, blooming effect.
—
## Tips to Avoid Over-Obsessing
The key to making this décor work is embracing imperfection and simplicity. Here’s how to avoid obsessing over the look:
* **Avoid Symmetry:** Nature rarely creates perfect symmetry, and neither should your arrangement. Random clusters look more authentic.
* **Start Small:** Don’t attempt to cover an entire branch initially. Begin with a few pearl strands and gradually build if needed.
* **Keep Balance:** Pair your pearl branch décor with simple, neutral surroundings to prevent visual overload.
* **Accept Natural Variation:** Branches vary in size, shape, and color. Let these irregularities shine instead of trying to force uniformity.
Remember: the goal is effortless elegance, not perfection.
—
## Why This Trend Resonates
The popularity of breaking fake pearl necklaces and wiring them onto branches is rooted in several cultural and psychological trends:
1. **DIY Culture:** People are increasingly drawn to hands-on, personalized home projects. Creating pearl branch décor allows for customization and creativity.
2. **Slow Living:** This project encourages mindfulness and patience, aligning with the slow living movement.
3. **Sustainable Aesthetic:** Using thrifted or old jewelry repurposes materials and reduces waste, making it an eco-conscious choice.
4. **Textural Contrast:** Modern interiors often rely on mixing textures—smooth pearls and rough branches provide an eye-catching combination.
—
## Common Mistakes to Avoid
Even simple DIY projects can go awry if you’re not careful. Here are common mistakes and how to avoid them:
* **Overcrowding Pearls:** Too many pearls can make the branches look cluttered. Space them out for a more elegant appearance.
* **Using Thick Wire:** Thick wire can look bulky and detract from the delicacy of pearls. Thin, flexible wire works best.
* **Ignoring Branch Shape:** A straight, boring branch can make the whole project dull. Look for curves and offshoots to enhance visual interest.
* **Forcing Symmetry:** Trying to make both sides match perfectly will make it feel artificial. Let natural variation guide your design.
—
## Beyond Pearls: Experimenting with Variations
Once you’ve mastered the pearl-on-branch look, you can experiment with other materials:
* **Beads:** Colorful beads can replace pearls for a playful, vibrant look.
* **Crystals:** Small crystals wired onto branches add sparkle and luxury.
* **Feathers or Fabric Strips:** For a bohemian twist, tie lightweight fabric strips or feathers alongside pearls.
* **Lights:** Tiny fairy lights woven through the branches create a magical ambiance for evening décor.
The possibilities are endless—the key is keeping the arrangement light and unforced.
—
## Incorporating Into Different Spaces
Pearl branch décor can enhance almost any room:
* **Living Room:** As a centerpiece or mantel décor, it adds sophistication and texture.
* **Bedroom:** A single branch in a vase on a nightstand creates a soft, serene focal point.
* **Bathroom:** Small pearl branches can adorn a vanity counter or shelf, adding subtle luxury.
* **Entryway:** A pearl-wired branch in a tall vase welcomes guests with understated elegance.
This DIY project adapts well to both small apartments and large homes, providing a touch of creativity without consuming space.
—
## The Philosophy Behind the Look
What makes wiring pearls onto branches so appealing is not just aesthetics—it’s about mindset. This project encourages:
* **Embracing Imperfection:** The natural variations in branches and pearls remind us that imperfection can be beautiful.
* **Simplicity Over Excess:** A small branch with a few pearl clusters can be more visually striking than elaborate décor.
* **Mindful Creativity:** The act of wiring pearls is meditative and grounding, giving a sense of accomplishment and satisfaction.
By not obsessing over the final product, you create a piece that feels organic, intentional, and effortlessly stylish.
—
## Conclusion
Breaking fake pearl necklaces and wiring them onto branches is more than a DIY trend—it’s a versatile, elegant, and sustainable way to bring personality into your home. The combination of organic branches and lustrous pearls offers a striking textural contrast that works in various décor styles, from minimalist to bohemian.
The key to success is simplicity: start small, embrace imperfections, and avoid overcomplicating the look. By doing so, you create a décor piece that feels curated without effort—a perfect example of understated elegance.
Whether displayed on a mantel, as a centerpiece, or mounted on the wall, pearl-wired branches invite a sense of creativity, mindfulness, and charm into any space. Next time you’re cleaning out old jewelry or taking a walk in nature, think about how these humble materials could transform into your next standout décor piece.
—
**Word Count:** 1,512
—
If you want, I can also create a **list of 10 different styling variations** for these pearl-branch décor ideas that are ready to try at home, so the post becomes even more practical and engaging for readers.
Do you want me to do that?
